Last reviewed: July 14, 2026. Product features, apps, maps, trail access and vehicle accessories change, so verify current details before buying or relying on this setup.
This refreshed article keeps the original media and turns the post into a clearer support page for install garmin tread on a can-am defender hd7.
How This Fits Into ATV Trip Planning
A good Can-Am Defender or ATV setup should support the ride plan: legal route, useful navigation, working communication, recovery readiness and enough comfort to handle Atlantic Canada weather.
Current Checks
- Confirm product compatibility with your exact machine or GPS.
- Check current app, firmware and map requirements.
- Verify trail access separately from the device or app.
- Test the setup before using it on a remote ride.
Access And Rules To Verify
ATV route access changes. Before riding, check the Nova Scotia OHV information page, ATVANS, ATVANS approved road trails, or QuadNB for New Brunswick routes. Also follow posted signs, landowner rules, club guidance, seasonal closures, fire restrictions and local laws.
Related AvoidingChores ATV And Navigation Guides
- Atlantic Canada ATV trip-planning guide
- Remote ATV ride packing checklist
- Prepare satellite communicator contacts before a trip
- Plan an off-road ATV trip with Gaia GPS and Garmin Explore
- Find trail access and difficulty information on Garmin Tread
- Garmin maps: free vs paid options for handheld GPS users
- Garmin inReach vs ZOLEO for Canadian outdoor users
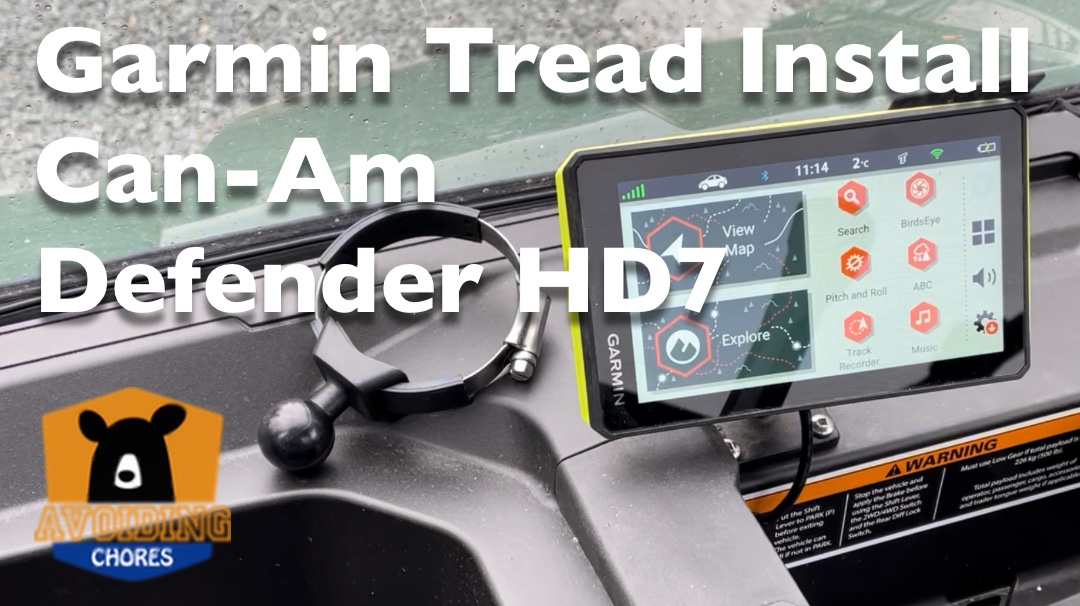
Original Videos And Images
Existing reader-facing media from the previous version of this post has been preserved below.
Original Photos