Tag: camping
-
Nova Scotia’s 2026 Wildfire Season: What Every Camper and Hiker Needs to Know Before You Go
Nova Scotia’s provincial parks opened for the season back in May, and if you’ve already booked a site for July or August, here’s the short version: pack like always, but check the burn map before you light anything. Provincial officials have been straightforward about it this year — another dry wildfire season is expected, and…
-
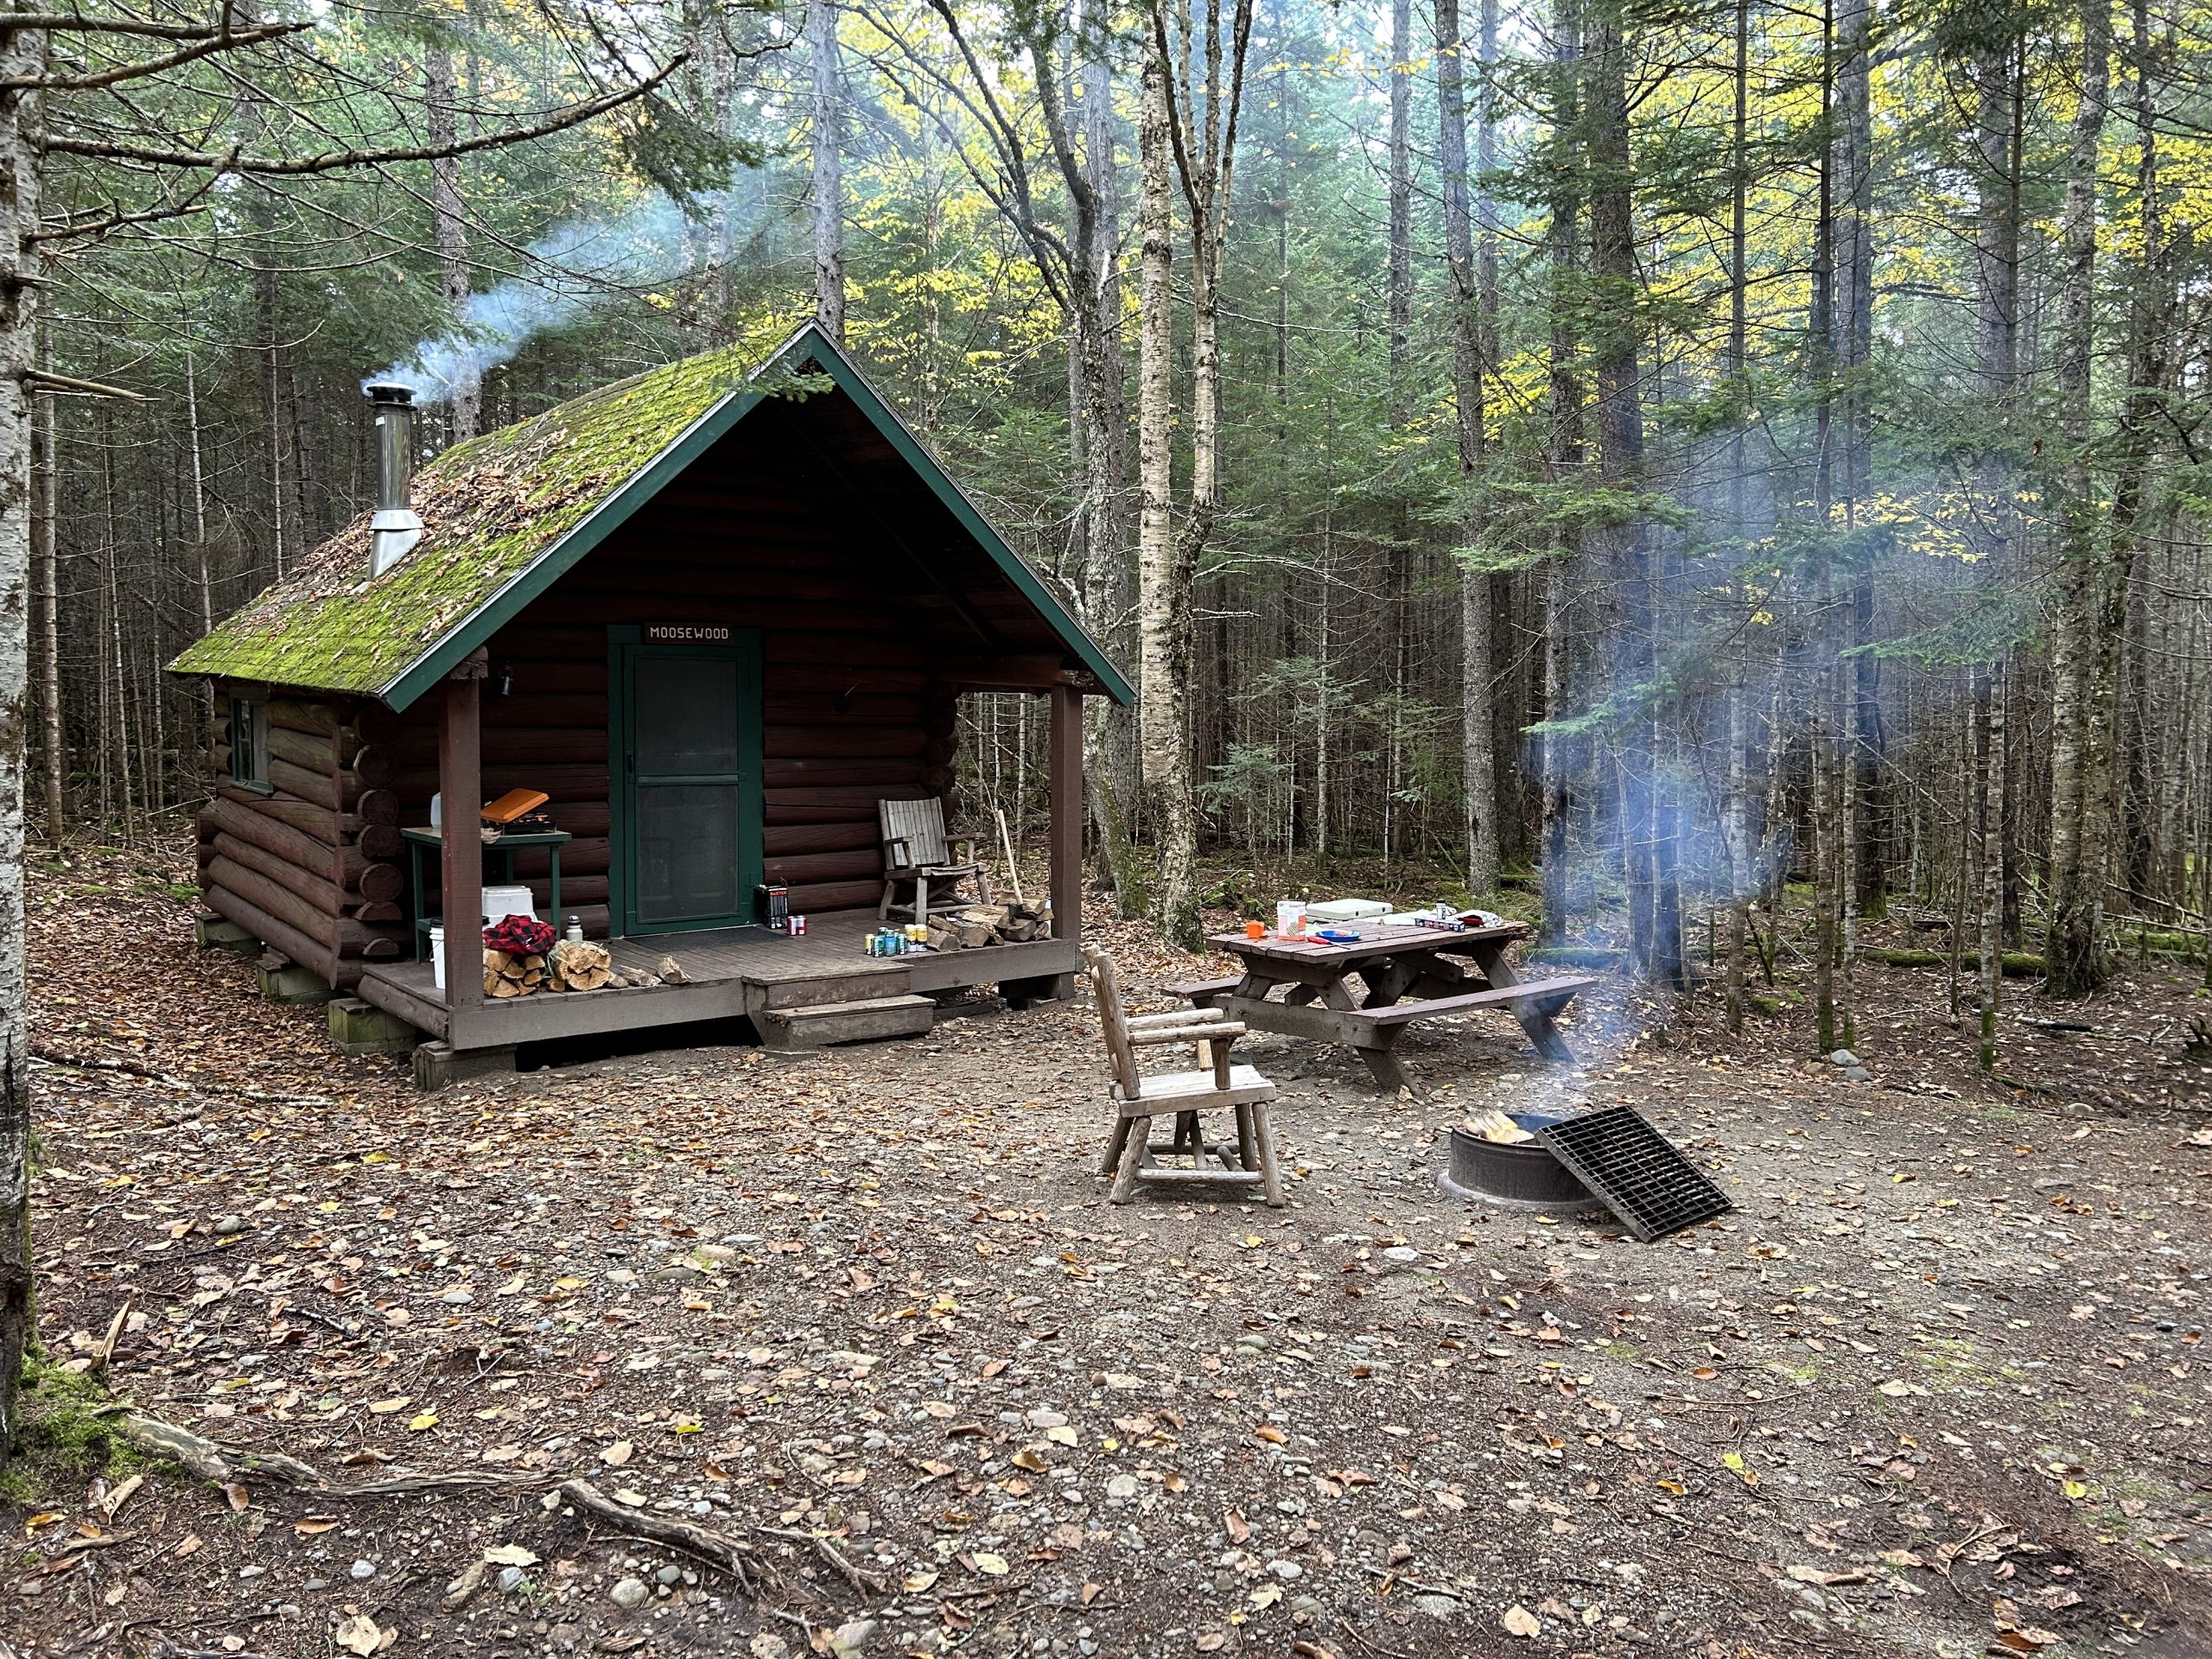
A Cozy Escape at Moosewood Cabin in Baxter State Park
Nestled amidst the pristine wilderness of Baxter State Park, Moosewood Cabin (Cabin 13) at Kidney Pond Campground offers a tranquil retreat like no other. I recently had the pleasure of spending three unforgettable nights here, from October 16 to 18, 2023. I’ll take you on a virtual journey through my experience at Kidney Pond, delve…
-
Truck Camping With Kodiak Canvas Truck Tent
During our research for a new family camping tent, I looked at a few options where you pitch your tent over your truck bed. It looked interesting but we passed on it and bought the Kodiak Canvas Cabin Tent – which for family camping was a good choice. However, there are times during the shoulder…
-
5 Tips to Keep Your Camping Gear Dry
Hiking in the rain is enjoyable for many reasons. The plants and grass look greener, insects come out of the ground and attract birds, and the trails are less crowded. On the flipside, you have to take care to ensure that you and your gear don’t get wet. Use these tips to stay dry and…
-
Family Camping With Kodiak Canvas Cabin Tent
If You Don’t Want To Buy a Tent Trailer At the end of last summer, our faithful dome tent of nine years finally told us it was time to retire and look for a new tent. The tent, Chinook Twin Peaks Guide 6 was a great tent for the east coast and there were three…
-
DECKED Storage System For Your Truck
I got the DECKED storage system for my F150 truck as a way to get some storage but keep my truck bed open and not install a tonneau cover or truck cab. The install process is identical to the videos you see from DECKED with a few exceptions for the F150 or Tacoma where the…
-
All-In-One Coffee Brewer Kit For Camping – Cafflano Klassic
I wasn’t feeling the love with the various outdoor systems out there and I wanted something nicer that would be more than just for backpacking. So I found this Cafflano Klassic all-in-one pour over coffee maker at my local hipster coffee shop, but your can find it also at large outdoor stores like Mountain Equipment…
-
Chinook Twin Peaks Guide 6 Tent Review
After nine good years as our primary family camping tent, it’s time to retire the Chinook Twin Peaks Guide 6 tent. At time of recording, the tent is still available on Amazon as such I recommend it as a great budget tent for a young family of four or couple that want a lot of…
-
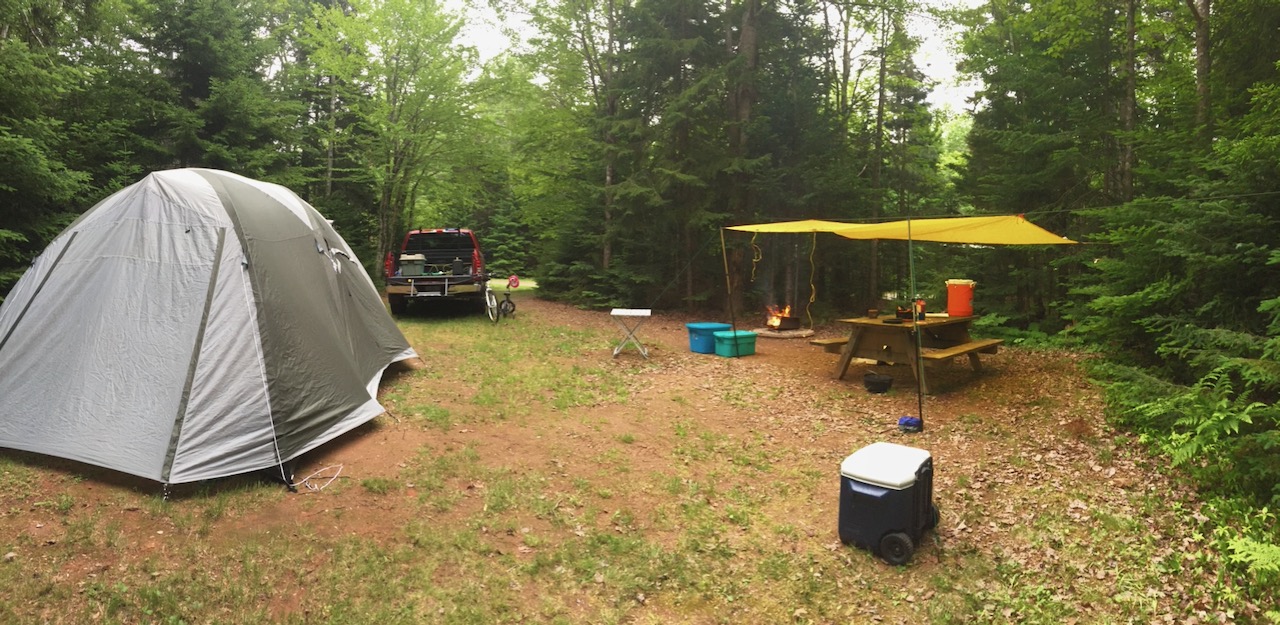
How We Got Back Into Family Car Camping
[info_message style=”info”]This post will be updated as we do more trips and upgrade our gear as we go along![/info_message] We haven’t done any car camping in several years, I had gone down the path of hammock camping and rustic camping with the boys for the last few years. This summer, we wanted to do more…
-
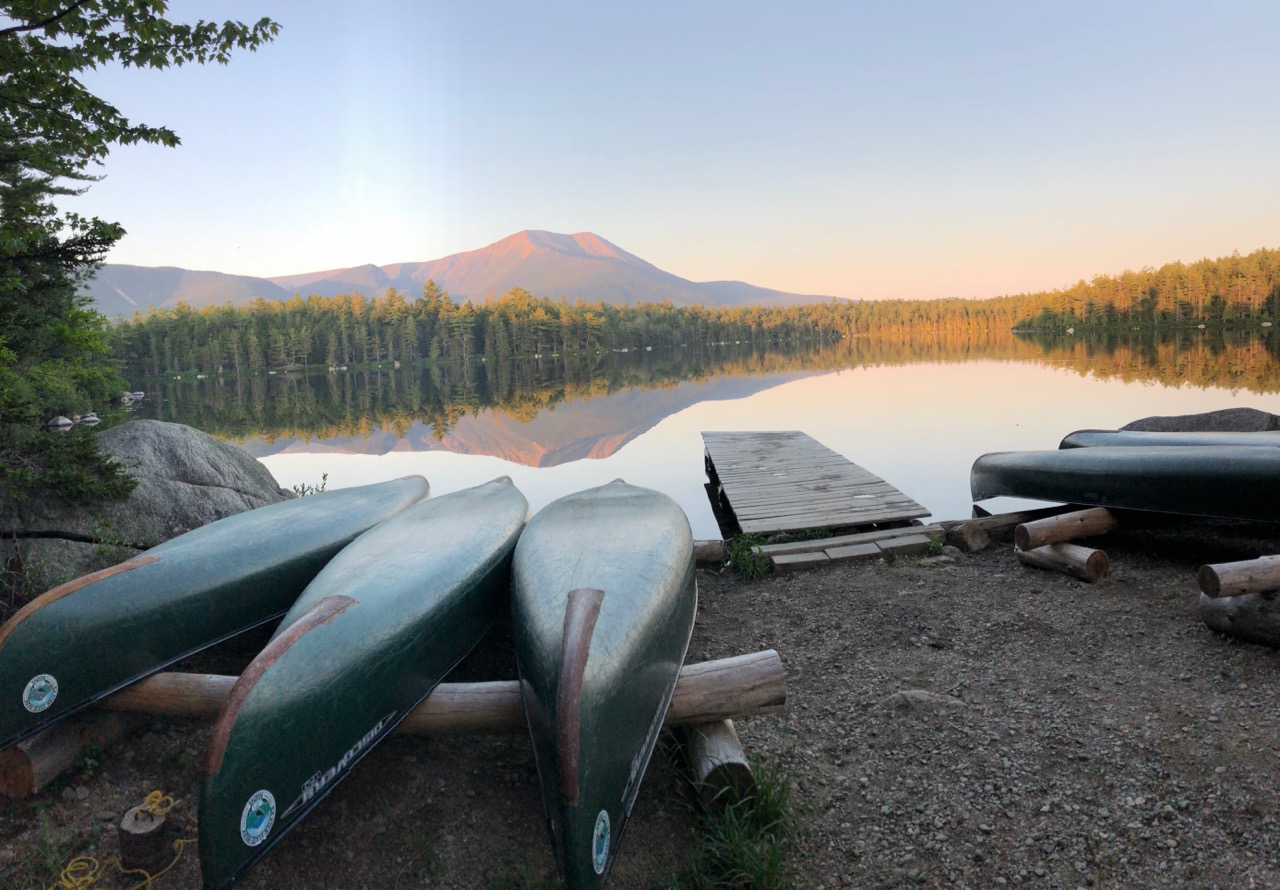
The Cabins At Daicey Pond in Baxter State Park
Note that Daicey Pond will be closed for Cabin renovations for the 2024-2025 season. Access to the lake for day activities are still expected. More can be found here. Baxter State Park I grew up only 2 hours from this state park, albeit across the Canadian border, but I would look out the window as…